 | This is part two of a three part series comparing SharePoint Search with KnowledgeLake Search. KnowledgeLake Search has many features you just won’t find in SharePoint Search and features that are comparable to SharePoint out of the box but are not easy to use. You could try implementing some of these features on your own, but KnowledgeLake Search has years of experience enhancing SharePoint Search. |
KnowledgeLake Search to SharePoint Search Features
| Feature | KnowledgeLake Search | SharePoint Search |
| Metadata searching | Yes | No |
| Saved searches | Yes | Yes |
| Multiple searches | Yes | No |
| Filtering results | Yes | Yes |
| Sorting | Yes | Yes |
| Grouping | Yes | No |
| Search Center | Yes | Yes |
| Web Parts | Yes | Yes |
| Custom columnar results | Yes | No |
| Real time user interface customization | Yes | No |
| Localization of managed properties | Yes | No |
| In-line editing of search results | Yes | No |
| Document preview | Yes | No |
| Advanced options | Yes | Yes |
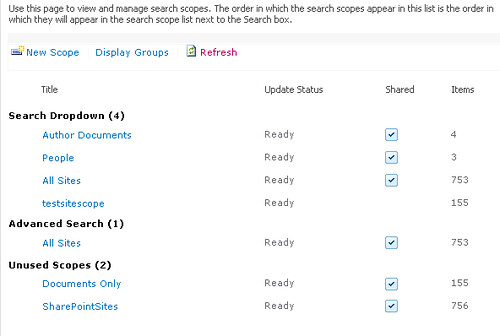
| Scopes | Yes | Yes |
| Exporting results | Yes | No |
| Email links and attachments | Yes | No |
| Federated search results | No | Yes |
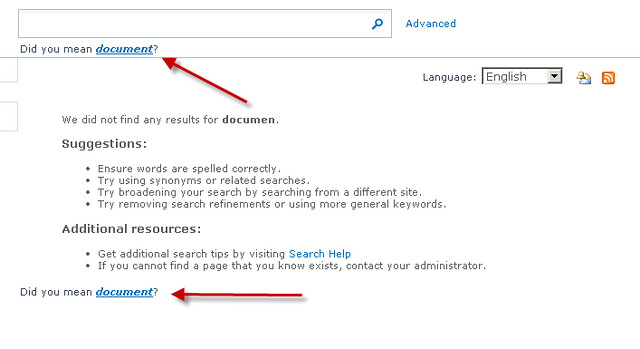
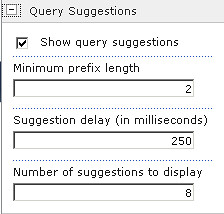
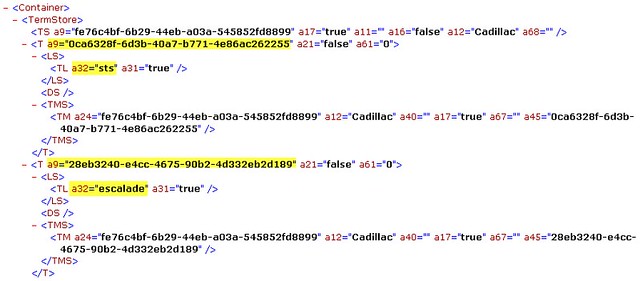
| Query suggestions | No | Yes |
In this post I will cover the features highlighted in red. In part one I covered Metadata searching through Grouping.
KnowledgeLake Search vs SharePoint Search Part One
Search Center
Both SharePoint and KnowledgeLake offer a Search Center site template. Many people ask what exactly is the benefit of a Search Center.
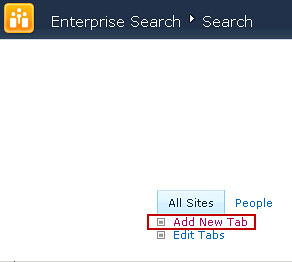
Following search UI best practices, the Search Center provides a consistent UI for different types of searches. The SharePoint Search Center comes with a tab control that enables you to organize links to other search pages. Each tab can represent a different type of search for users. For example, some types of searches might only need a standard search box and search results. Other types of searches might require a more advanced search that includes property searching along with a refinement panel with the results. Each tab enables you to customize the search and the results UI using the SharePoint Search web parts. Customization is easy thanks to customizable search pages that are based on a search template.

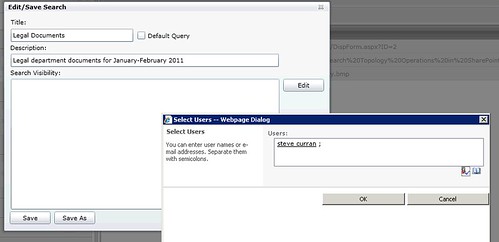
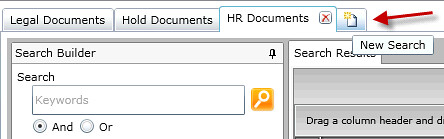
KnowledgeLake also provides a Search Center site template. The template provides a consistent UI for searching. However, customization is not needed because all features for effective searching are available to the user and an administrator is not needed. Term and property searches, scoping of searches including path scoping and the ability to select what data to display in the results are all customizable by the user. The KnowledgeLake Search Center lets users have as many ad hoc and saved searches open as they want. Users can see the search criteria and the results on the same page. The search center allows users to save, share, and export searches.
Web Parts
SharePoint offers a plethora of search web parts. These include a standard search box, advanced search, standard search results, search paging and refinement panel. The many web parts gives an administrator a great amount of flexibility in designing custom search pages to fit user’s needs. A great place to learn more about all the different SharePoint search web parts is in the “SharePoint 2010 Enterprise Content Management Implementers’ Course” on TechNet. Check out module 8 “Search User Interface”.
http://technet.microsoft.com/en-gb/sharepoint/hh134718
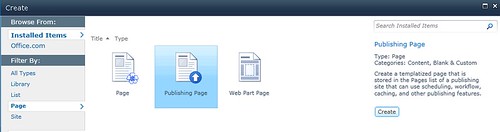
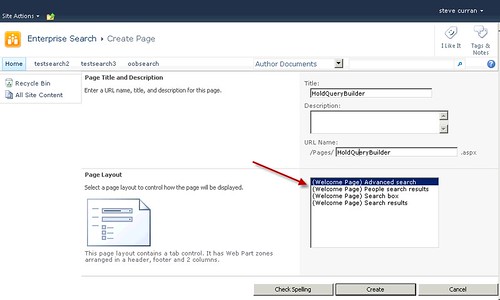
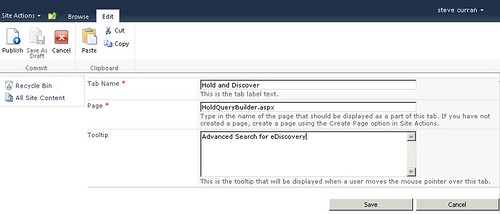
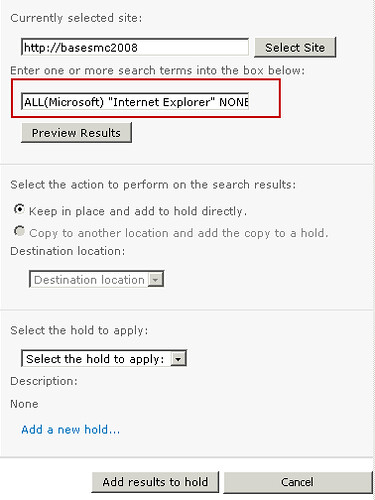
KnowledgeLake Search includes two web parts. One is the Query Builder web part. This web part displays a saved query that was built from the KnowledgeLake Search Center. As a search manager you can build a custom search with terms, metadata properties, scopes, and advanced options. The web part’s configuration can further customize the search by allowing a designer the ability to hide or disable criteria being used in the search. Compared to the SharePoint Search web parts, KnowledgeLake’s Query Builder web part is very easy to build a custom search without having to connect and configure multiple web parts. SharePoint Search web parts requires users to have knowledge of XML and XSLT to customize functionality.
With KnowledgeLake Search In order to see the results you must deploy the “Query Results” web part. This is the same results control you see in the KnowledgeLake Search Center with all the rich UI functionality, including thumbnails and the ability to edit properties in-line. There is no configuration needed if you locate it on the same web part page as the Query Builder web part. This is a big advantage over SharePoint Search because deploying the SharePoint Core Search Results web part on the same page as the Advanced Search web part is virtually impossible. The Query Results web part also supports a URL based API. This enables the Query Builder web part to redirect a search to the Query Results web part using a URL similar to the SharePoint Core Search Results web part. The KnowledgeLake Search web parts can also be used to customize SharePoint Search Centers.

Custom Columnar Results
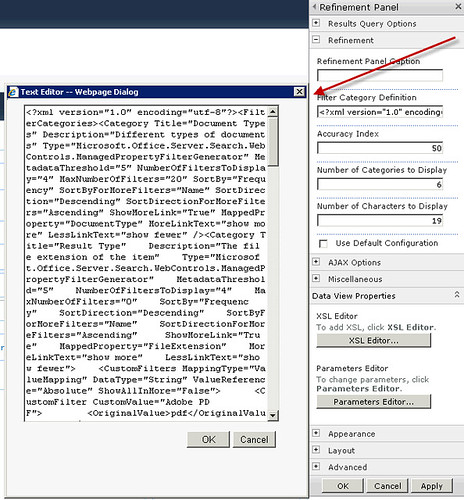
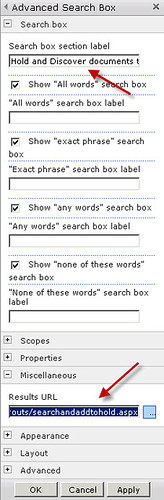
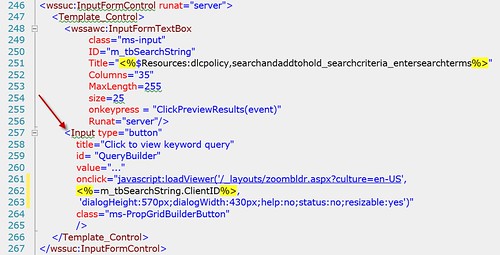
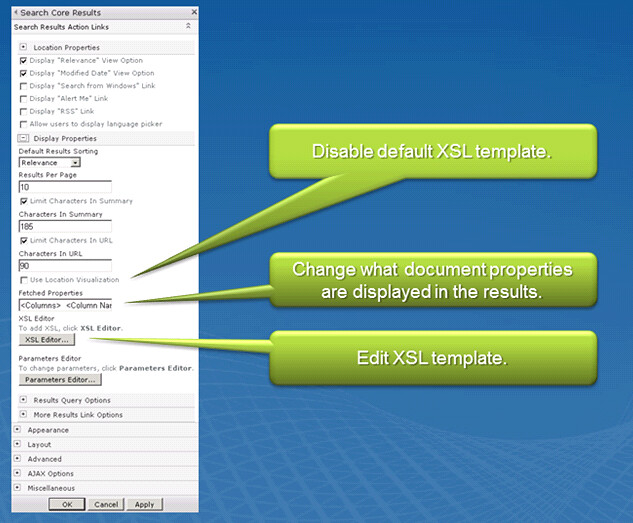
Having the ability to customize what data is returned in search results is a must for any ECM search solution. The data returned in a search results is the only information a user has to determine if the result is what they are looking for. Site administrators can customize the SharePoint Core Search Results web part to add additional properties to be returned in the results. Unfortunately, site administrators must have a working knowledge of XML and XSLT. Below is a graphic of the configuration pane for the SharePoint Core Search Results web part.
Customizing which document properties are displayed in search results and how they are displayed is accomplished by modifying an XML and an XSL template. The first step is to uncheck the Use Location Visualization check box. This disables the use of the default XML for viewable document properties and the XSL template for rendering results. This makes it easy to revert back to SharePoint’s default display of search results.
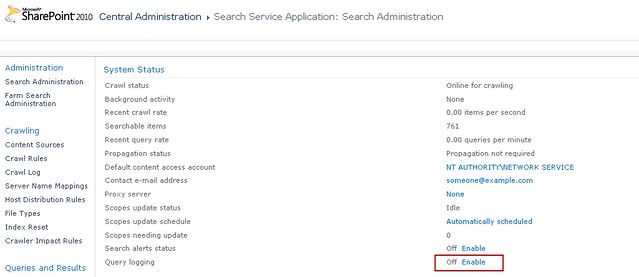
The second step is to add any document properties you want displayed to the Fetched Properties text box. This text box contains XML containing column elements that define the names of document properties returned with search results. The final step is to edit the XSL template to display your document properties and manipulate how they are displayed. Clicking on the XSL Editor button displays a Web dialog containing the XSL template. This can be copied to a text editor where you can modify it. After modification, copy the edited text back into the dialog and save it. As you can see this is not an easy process. Also the document properties are not displayed in a columnar order making it difficult for users see and use in comparison with other results.
 |

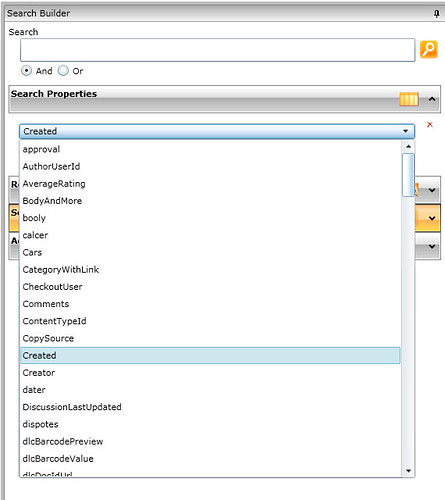
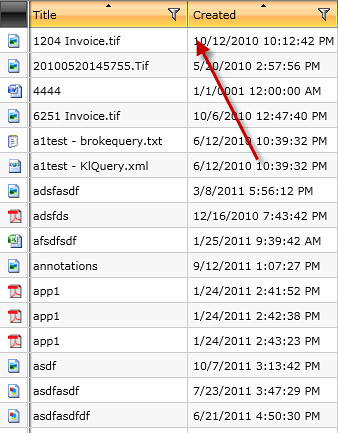
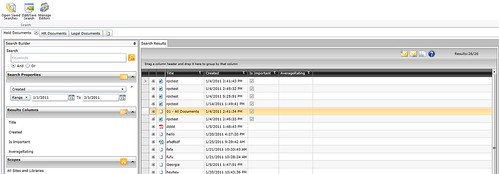
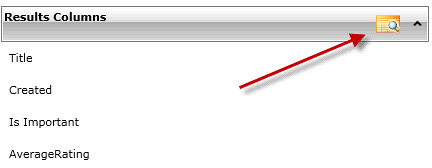
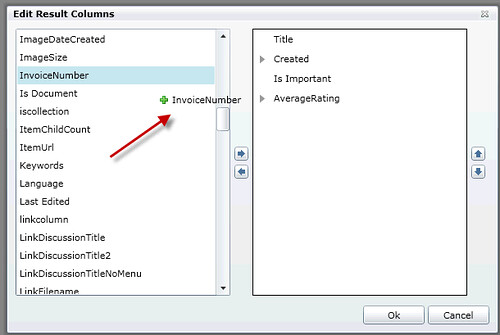
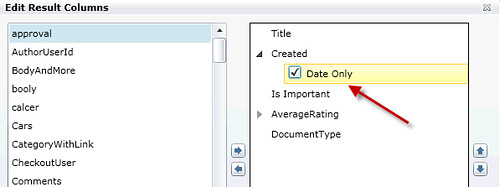
The KnowledgeLake Search Center easily allows for adding whatever available document properties to your search results. Users (not Site Administrators) just need to click on the button in the result columns pane and then drag and drop document properties to be displayed. This dialog also lets users position the properties in order that they want them displayed. The properties are displayed in columns making it easy to see and compare. The customized results can be saved and then used from any KnowledgeLake Search Center or web part.
 |
Real Time User Interface Customization
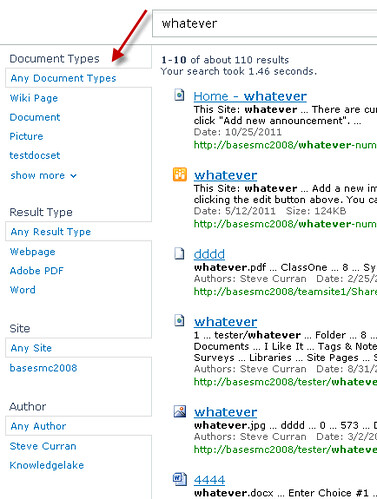
One of the most important aspects of an effective ECM search solution is the ability to manipulate search results to make is easy for users to find what they are looking for. SharePoint Search has the Refinement Panel web part which allows users to select certain categories of document properties and the search results will be filtered to that category. This web part is also difficult to configure by a site administrator and requires knowledge of an xml schema. The user has no ability to manipulate the search results.
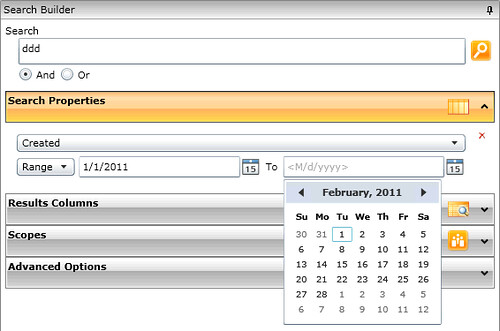
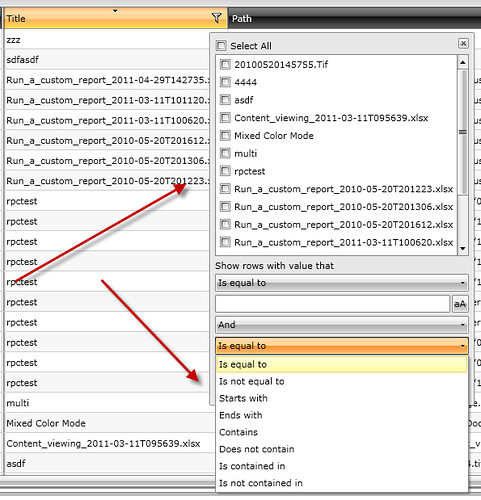
KnowledgeLake Search does allow for users to manipulate search results. The user can drag column headers to the top of the search results to group by one document property or multiple. The grouping also show the counts of results in the group. Users can also re-position and re-size columns to make it easier to compare results. Sometimes when grouping by dates users may not want to include the time portion of the date or the decimal precision of a number is too long. Users can edit the result columns format. They can choose not to display the time of a date property or limit the number of decimal places.


Localization of Managed Properties
Managed properties are the document properties used when searching for documents in an ECM solution. SharePoint provides the ability for search administrators to create managed properties using names that make sense to the business and users. For example, if a business has multiple departments that have document properties called “Customer Number” and “Customer ID”, then a search administrator can map both these document properties to a managed property called “CustomerNumber”. This provides a consistent property search across departments. However one of the biggest complaints about the naming of managed properties is the SharePoint Search restriction of not being able to put spaces in the names. In the example given it would be easier for users to remember the name by using “Customer Number” instead of “CustomerNumber’”. KnowledgeLake gives administrators the ability to name managed properties any way they want. Administrators can define a resource file to map a managed property name to any display name desired. So if you have users who want to search using “Invoice Number” instead of “InvoiceNumber” then this is not a problem. Another problem is localization of managed properties. So if you have a French SharePoint site then they will be forced to use the built in English managed properties. Searching can become confusing for mixed language farms. Using the resource file mapping provided by KnowledgeLake Search, administrators can define language based resource files that map managed properties to a localized name. The KnowledgeLake Search center and web parts will display the localized managed property helping your international users find what they are looking for.
In-Line Editing of Search Results
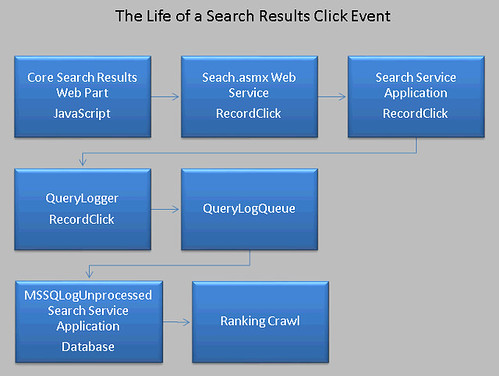
An important search best practice is giving users the ability to take action on the search results. For instance, the user has already spent time looking for the document so a good ECM search solution should give the user the ability to view, check in, check out, declare as a record or even edit the properties of the document. Of course KnowledgeLake Search gives you a context menu for each result to execute such actions without having to navigate away from the search results. This makes for a very efficient use of search. Below is a picture of how you can expand a search result to display a property edit form. The form can take advantage of any KnowledgeLake Index behaviors set up to enhance indexing of the document.

Document Preview
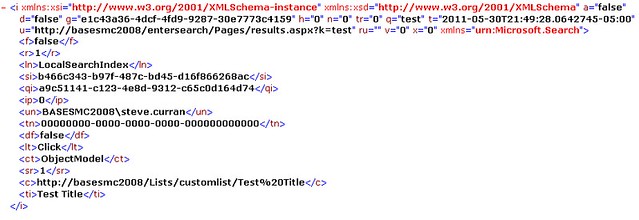
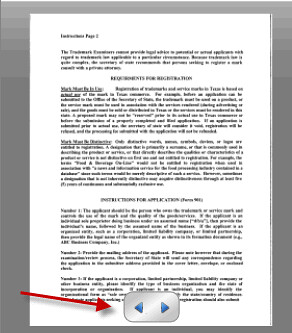
One of the most useful search feature is the ability to preview a document within the search results. This helps users find documents by providing a glimpse into the document. SharePoint Search does not provide this, however, SharePoint Fast Search does provides a thumbnail of the first page for Microsoft Word and PowerPoint documents. KnowledgeLake Search provides a “Thumbnail Viewer” in the search results enabling users to page through and visually inspect the complete document within the results. The best part about this viewer is the ability to view many document formats such as Microsoft Word, PowerPoint, Excel, MSG, PDF, TIF, JPG, BMP and PNG. This feature is a powerful enhancement for any ECM search solution.
Why would you want to search SharePoint with anything else?
This concludes the second part of a three part series of comparing KnowledgeLake Search to SharePoint Search. The features discussed in this post shows KnowledgeLake Search is much more efficient at helping users find what they are looking for. Your users are not searching SharePoint just to search but to accomplish a task. An effective search makes your organization productive letting your users spend less time searching for information. For example, It is estimated an effective search strategy can save approximately 3.7 hours per day per worker finding information*. This can translate to hundreds of thousands of dollars annually depending on the number of information workers and the hourly cost. The ability to let users dynamically add metadata, group, sort and fully preview documents when searching will increase search productivity substantially over the out of the box SharePoint Search. Being able to accomplish this without a site administrator and knowledge of XML and XSLT is a great advantage. Finally, allowing users to take action on search results directly speeds up the time to accomplish a task. Searching in SharePoint should be easy. It is is with KnowledgeLake Search.
*Source: IDC’s Information Worker Productivity Survey, October and December 2008 LinkedIn Survey